 TL;DR:
Learn how to enable chains and tokens, interact with APIs, and manage tokens seamlessly using the Okto SDK. A single API call empowers developers to build powerful token-based dApps without blockchain complexities.
TL;DR:
Learn how to enable chains and tokens, interact with APIs, and manage tokens seamlessly using the Okto SDK. A single API call empowers developers to build powerful token-based dApps without blockchain complexities.
Introduction: The Power of Tokens with Okto
Tokens are at the heart of blockchain applications. Whether you’re building DeFi platforms, gaming ecosystems, or NFT marketplaces, tokens drive user interactions and utility. However, working with tokens across multiple chains has historically been a nightmare.
Each blockchain has its own standards for accounts, token handling, and transaction flows, forcing developers to:
- Learn chain-specific models (e.g., account-based vs. UTXO).
- Construct intricate transaction objects.
- Manage gas fees, nonce handling, and retries.
This fragmented experience has made cross-chain development a daunting task.
Enter Okto. Okto abstracts away these challenges, offering a seamless and unified way to interact with tokens across diverse ecosystems. With Okto, transferring tokens (whether native, ERC20, or other fungible assets) across any of the diverse chains becomes as simple as one API call. No chain-specific nuances, no transaction complexity. Just a clean, developer-friendly experience.
In this guide, we’ll walk you through the steps to enable blockchain networks (chains) and whitelist tokens on the Okto dashboard. We’ll also dive into various API functions provided by the Okto SDK that allow you to interact with tokens.
By the end of this guide, you’ll be equipped to integrate token interactions into your applications, unlocking the full potential of cross-chain development without the blockchain headaches.
Enabling Chains and Whitelisting Tokens
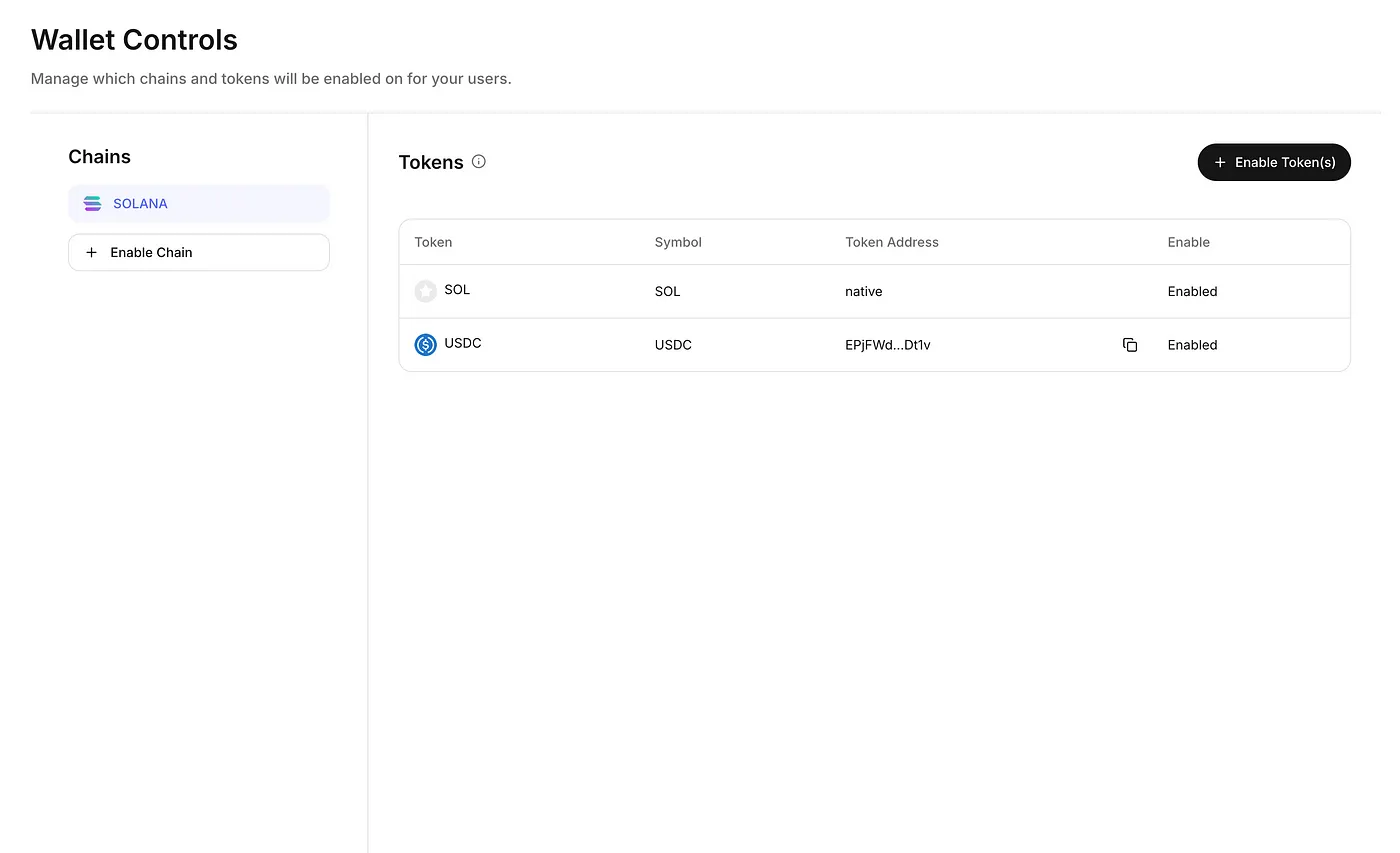
Before you can start interacting with tokens, it’s essential to configure which blockchain networks (chains) and tokens your application will support. This configuration is done through the Okto dashboard’s Wallet Controls feature.
Enabling Chains
Chains represent the blockchain networks your users can access. By enabling specific chains, you determine which blockchain ecosystems your users can interact with through their Okto wallet.
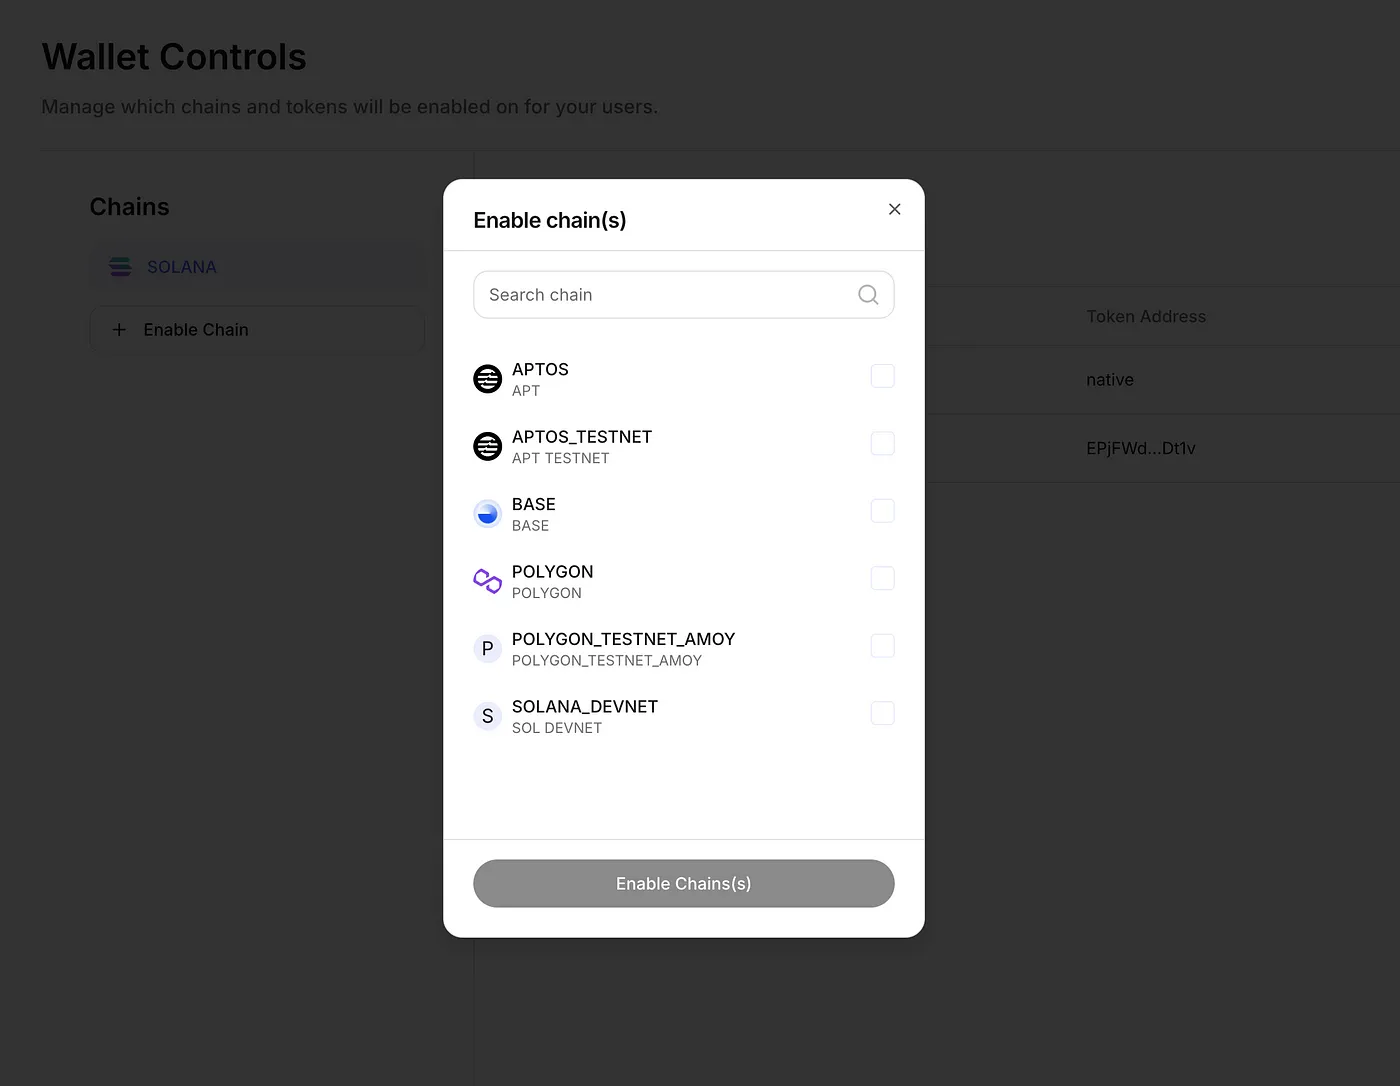
To enable a chain:- Log in to the Okto Dashboard and navigate to the Chains & Tokens section of the Wallet Controls page on your Okto dashboard.
-
Click on the Enable Chain button.
-
In the pop-up window, you’ll see a list of available chains, including mainnet and testnet options.
-
Select the chain(s) you want to enable for your users.
-
Click Enable Chain(s) to confirm your selection.
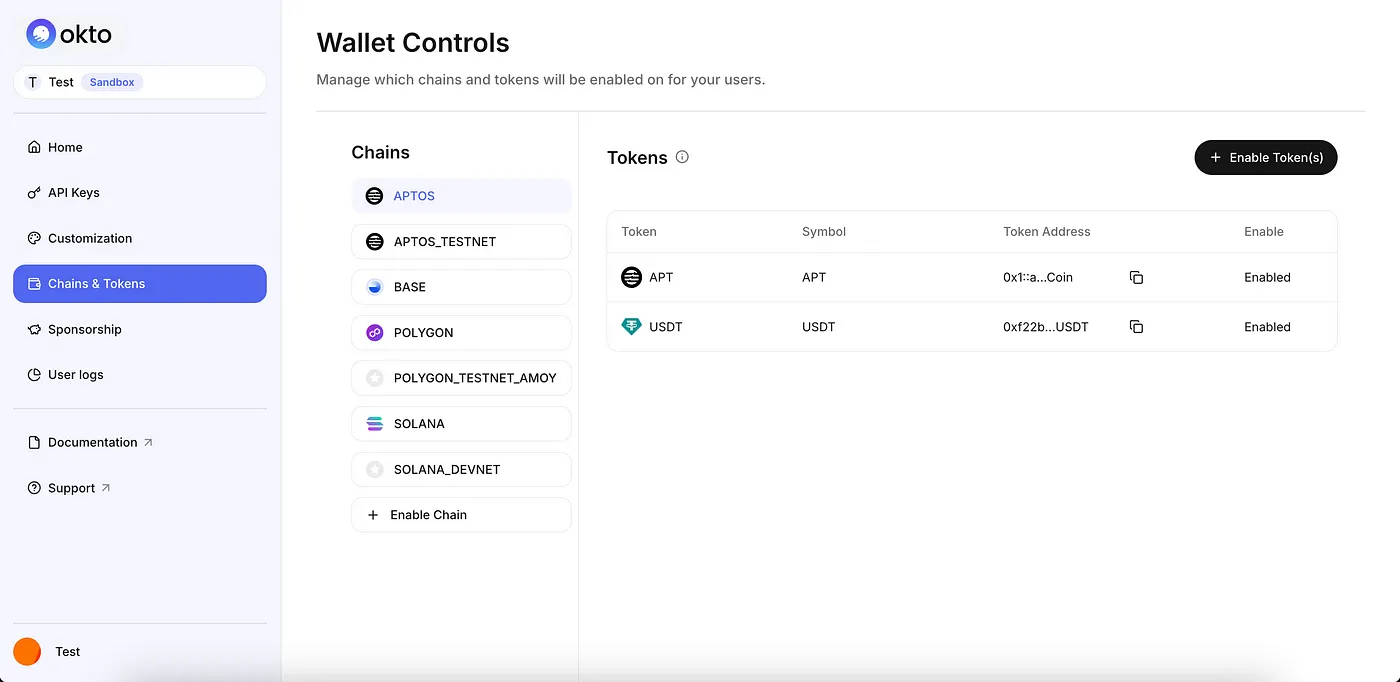
Enabling Tokens
Tokens represent the cryptocurrencies and digital assets your users can manage within their Okto wallet. You can choose from a list of whitelisted tokens for each enabled chain to ensure the assets relevant to your app are available to users.
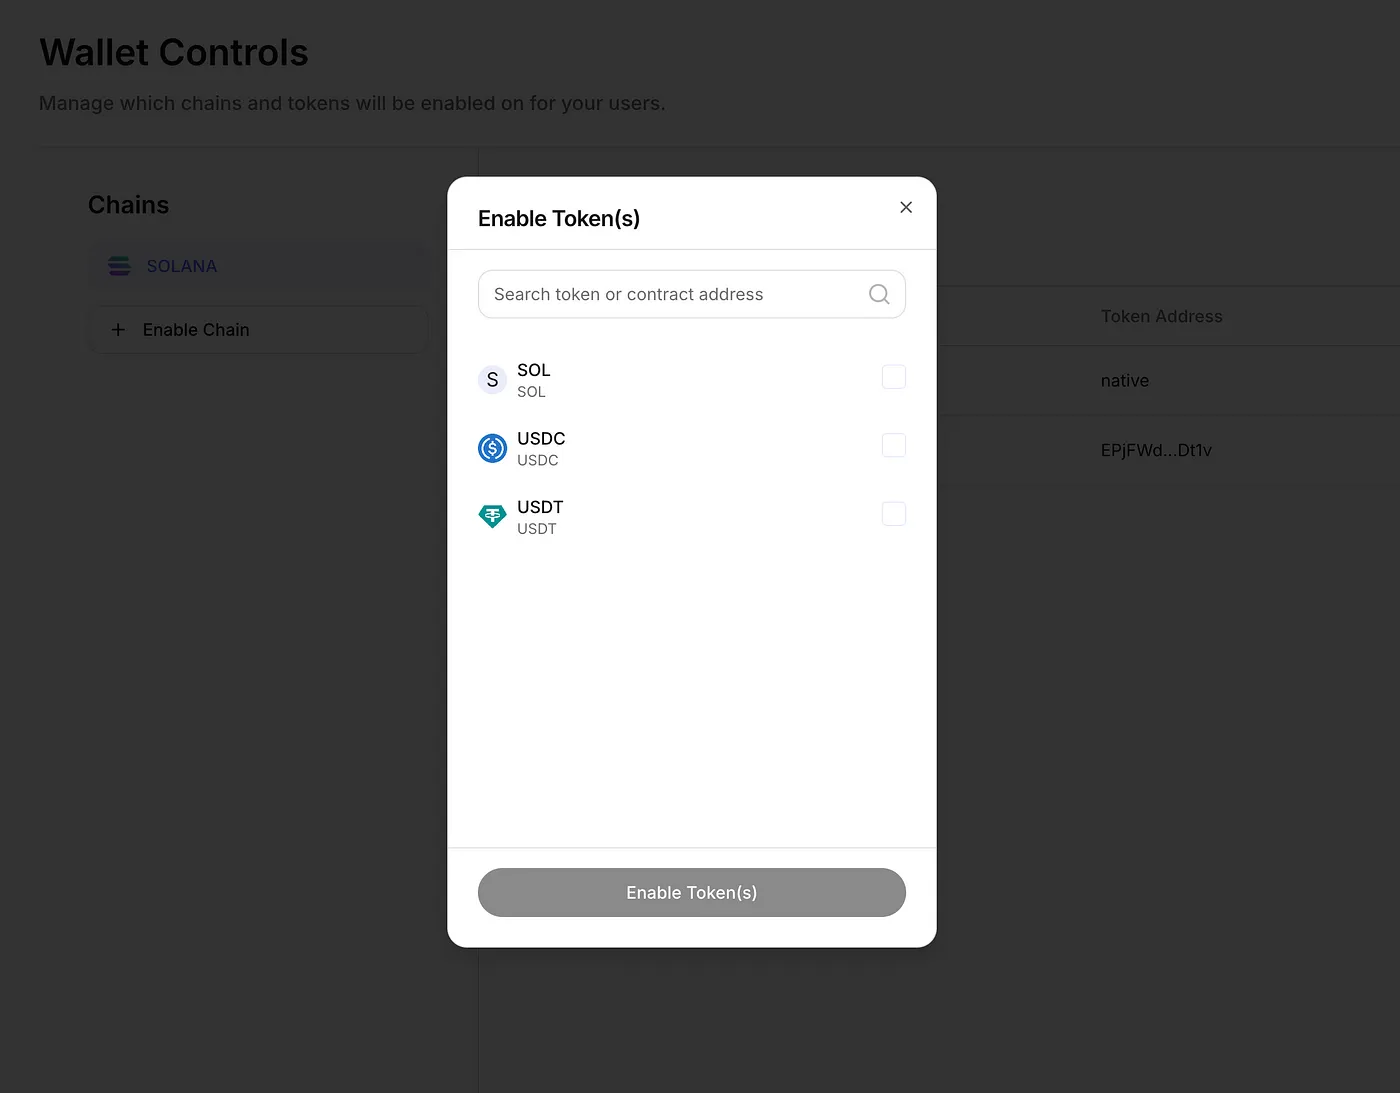
- Log in to the Okto Dashboard and navigate to the Chains & Tokens section of the Wallet Controls page on your Okto dashboard.
-
Click on the Enable Token(s) button.
-
In the pop-up window, you’ll see a list of available tokens for the enabled chains.
-
Select the token(s) you want to enable for your users.
-
Click Enable Token(s) to confirm your selection.
Interacting with Tokens via Okto SDK APIs
Now that you’ve enabled the desired chains and tokens, you can start interacting with them using the Okto SDK APIs. These APIs abstract the complexities of cross-chain operations, allowing you to perform critical actions like token transfers, portfolio management, and transaction tracking — all with just a few API calls.
1. Transferring Tokens: One API Call to Rule Them All
Transferring tokens across blockchains can be daunting due to differing account structures, gas fee mechanisms, and transaction object requirements. With Okto SDK, it’s as simple as one API call . You don’t need to manage chain-specific transaction logic.
Key Benefits:- Unified Experience: Transfer native and non-native tokens across multiple chains with the same API structure.
- Simplified Process: No manual gas estimation, nonce management, or transaction construction.
- Cross-Chain Compatibility: Works seamlessly for blockchains like Ethereum, Polygon, and more.
Endpoint: POST /api/v1/transfer/tokens/execute
If you’re using the Okto SDK, this API is wrapped in a function like transferTokens(data: TransferTokens).
2. Retrieving User Portfolio
The User Portfolio API fetches the portfolio data of a user, including all the tokens they own across all enabled networks. This is useful for displaying the user’s asset holdings within your application.
Endpoint: GET /api/v1/portfolio
If you’re using the Okto SDK, this API is wrapped in a function like getPortfolio().
3. Fetching Order History
The Order History API fetches all the orders (transactions) of the user, including the history of tokens sent and received. It’s useful for tracking the status of various transactions.
Endpoint: GET /api/v1/orders
If you’re using the Okto SDK, this API is wrapped in a function like orderHistory(query?: Partial<OrderQuery>).
4. Getting Supported Networks
The Supported Networks API retrieves all the blockchain networks (chains) that are whitelisted on your API key. It’s essential to know which networks are available so you can manage wallets and transactions accordingly.
Endpoint: GET /api/v1/supported/networks
If you’re using the Okto SDK, this API is wrapped in a function like getSupportedNetworks().
- React SDK — Supported Networks
- Flutter SDK — Supported Networks
- React Native SDK — Supported Networks
5. Getting Supported Tokens
The Supported Tokens API provides a list of all the tokens that are whitelisted on your API key for the enabled networks. Knowing which tokens are available allows you to display them in your application and facilitate transactions.
Endpoint: GET /api/v1/supported/tokens
If you’re using the Okto SDK, this API is wrapped in a function like getSupportedTokens().
Conclusion
In this guide, we explored how the Okto SDK simplifies token management and blockchain interactions. From enabling chains and tokens to transferring assets, viewing balances, and fetching transaction histories, the Okto SDK gives you all the tools you need to build powerful, token-based features with ease.
By abstracting away the complexities of different blockchains, Okto ensures you don’t have to worry about learning the nuances of each network. Whether you’re working with Ethereum, Solana, Aptos, or other ecosystems, Okto provides a unified way to interact with tokens — allowing you to build faster, smarter, and with confidence.
To dive deeper into the implementation details and explore additional features, head over to the Official Okto Documentation.
Stop worrying about blockchain specifics — start building your next great application with Okto! 🚀