Google Console Setup for Web Client ID
This guide will walk you through the steps to set up a project in Google Console, create an OAuth consent screen, and generate web and Android client IDs for Google authentication.
Creating a Project in Google Console
- Go to Google Cloud Console and sign in with your Google account.
- Click on the project selector dropdown at the top of the page.
- Click on "New Project".
- Enter a name for your project and click "Create".
- Once the project is created, select it from the project selector dropdown.

Creating an OAuth Consent Screen
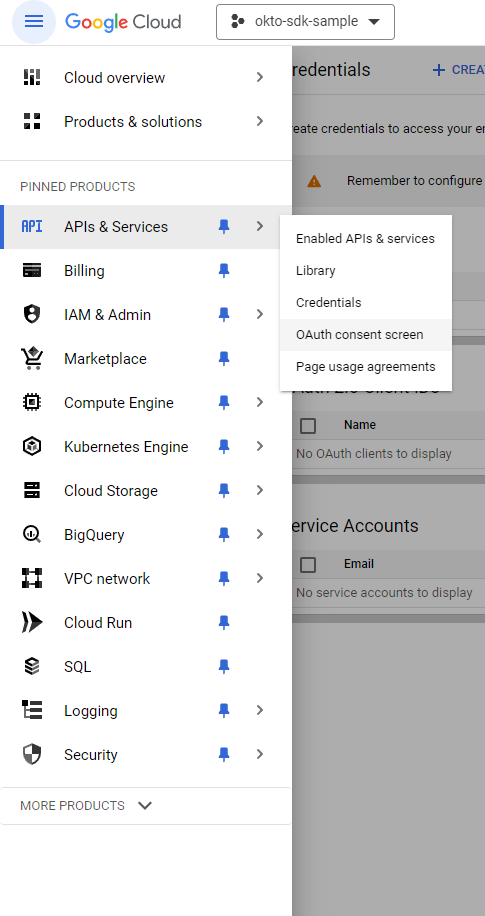
- In Google Cloud Console, navigate to the "APIs & Services" > "OAuth consent screen" page from the left sidebar.
- Click on "Create" to start setting up your consent screen.
- Choose the user type for your application (Internal or External) and click "Create".
- Fill out the required fields on the consent screen configuration form:
- Application name: Enter the name of your application.
- User support email: Enter an email address where users can contact you for support.
- Developer contact information: Provide contact information for the developer of the application.
- Click "Save and Continue".

Creating a Web Client ID
- Navigate to the "Credentials" page under "APIs & Services" in Google Cloud Console.
- Click on "Create credentials" and select "OAuth client ID".
- Choose "Web application" as the application type.
- Click "Create" to generate your web client ID.
- Copy the client ID and client secret provided.

Conclusion
You have successfully set up a project in Google Console, created an OAuth consent screen, and generated the web client ID for Google authentication. You can now integrate Google authentication into your web application using the Okto SDK.